How to Satup Namecheap custom domain on blogger site.
It’s very easy to Satup a custom domain in blogger site. At first create a blog in blogger and buy a domain name through Namecheap and then add Namecheap domain name to your Blogger using "+ Set up a third-party URL for your blog" link on your Blogger.
To Satup a custom domain in blogger follow the Below steps:
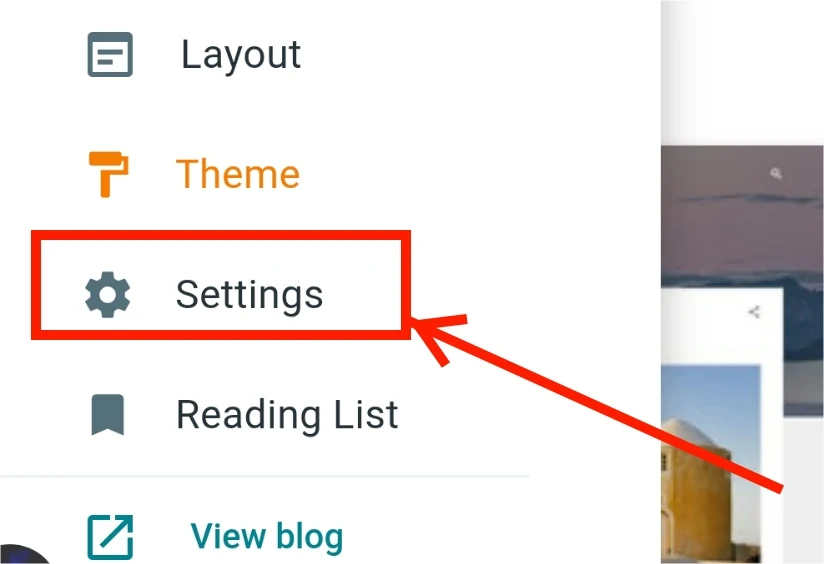
Go your Blogger Dashboard and click on Basics setting.
Click on Custom Domain (setup a Third party URL on your blog).
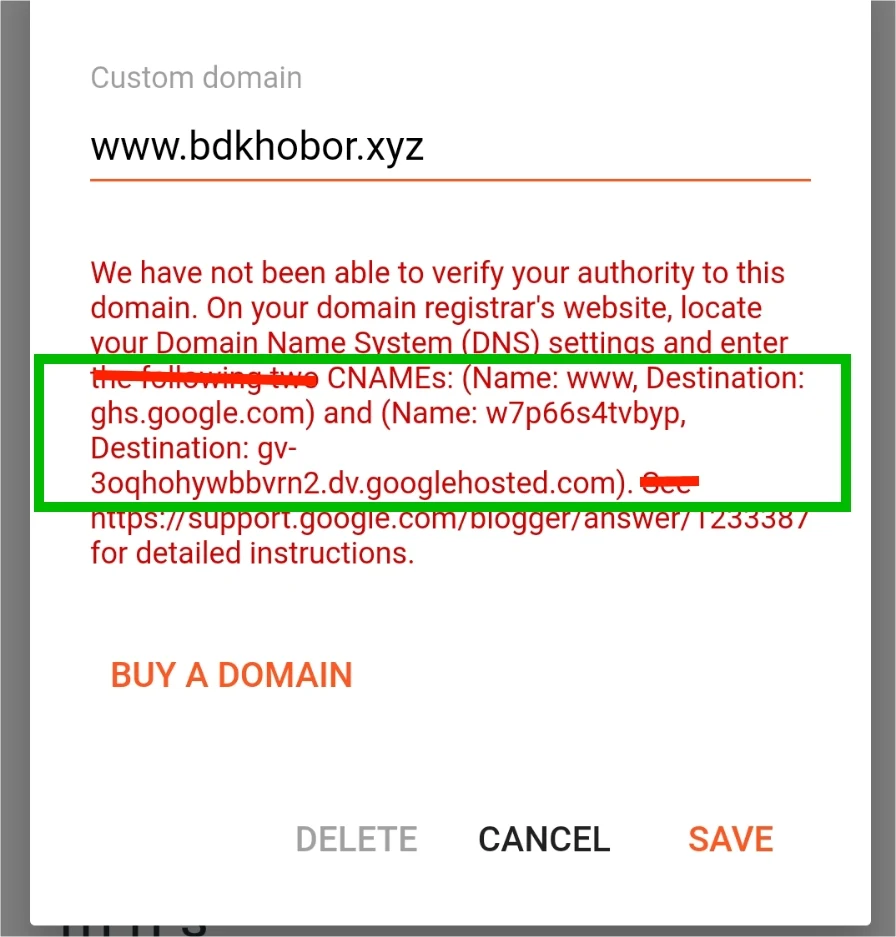
Add your Namecheap domain name and click on Save button.
After save domain name, you will get two CNAME records.
Now you need to add those CNAME records on your domain name so you can copy those two CNAME record .
First CNAME Record
Name:www
Destination:ghs.google.com
Second CNAME Record
Name: w7p66s4tvbyp
Destination: gv- 3oghohywbbvrn2.dv.googlehosted.com).
To Satup thos CNAME Record you can Login into your Namecheap account.
Now Click domain name to add CNAME records
Click on Home Icon Right Side of the Domain name than click Advance DNS.
Now click Add a new Record button.
Enter the first CNAME record here.
Enter other CNAME record
After save those two CNAME record go to your blogger dashboard > setting >Basic settin> custom Domain (Add your Namecheap domain)
Type your Custom Domain with www and Save.
Than go back to your blogger basic setting.
Turn On Redirect Domain,HTTP availability and HTPT Redirect.
That's it, you have successfully setup a custom domain on your Blogger with Namecheap.


